(continued from Service Insert: Pickup/Dropoff Tab)
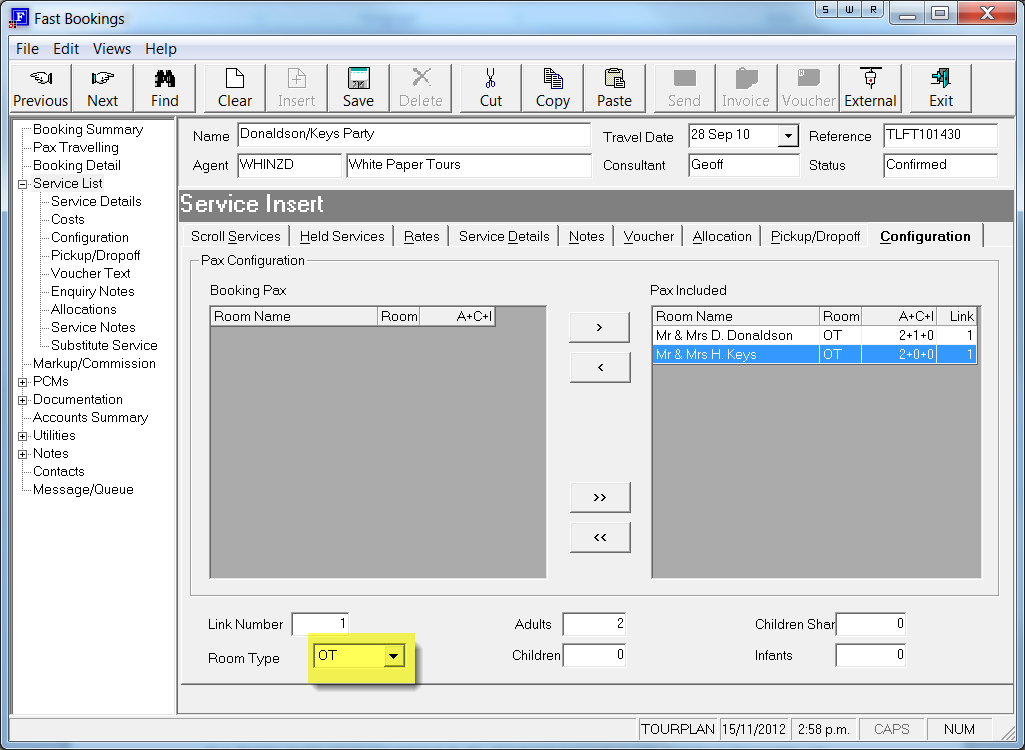
This screen enables the configuration of rooms for a service to be changed. To do this, use the arrows in the centre of the screen shown below to include or exclude rooms, or change the Link Number and Room Type to merge rooms.
In this example, the service being inserted is an Accommodation service. Rather than use two Double Rooms (as set up in the Booking Header), a two Bedroomed Apartment is going to be used. This means that just for this service, the room configuration is going to be altered.
In the fields at the bottom of the screen shown in screen shot following, the room type for the first room (Donaldson) has been changed to OT (Other). The second room (Keys) is then highlighted and the Link Number (which was two – i.e., the second Room in the booking) and is changed to one and the room type changed to OT.
Once these changes have been made, click ‘Save’ to add the service.
Screen Shot 43: Service Insert – Configuration Tab
If a ‘Room’ is not using the service at all, the arrow buttons in the middle of the screen can be used to move the room from the ‘Pax Included’ column to the ‘Booking Pax’ column.
|
|
If One passenger in a room is not using a service – e.g., one pax is not having a sightseeing trip, then the Configuration can be used to adjust the pax quantities using the service. This can only be done using the ‘Configuration’ option on the Side Bar menu once the service has been saved into the booking. |
|
|
Room Configurations can also be viewed/changed once the service has been saved into the booking - Service ListConfiguration. |
The column headings for Booking Pax and Pax Included are the defaults. Available column headings for Booking Pax and Pax Included are the same and are listed under Configuration Tab Scroll.
(continued in Service Insert: Service Details Tab)
 Tourplan iS V2.07 FastBook Training Guide
